Last updated: August 21, 2026
Sugar water in a warm plastic reservoir is an excellent growing medium, and it does not need long to prove it. Nectar that was clear on Monday can be faintly cloudy by Thursday, and by the weekend there are black specks in the neck of the bottle and a slick around the inside of the ports that a rinse under the tap will not shift.
Cleaning a hummingbird feeder is a five minute job that people skip because the last one took twenty minutes and involved a screwdriver. This walks through the routine, the vinegar question, how often the published sources say to do it, and the point at which the honest answer is to replace the feeder rather than keep scrubbing it.
This article contains affiliate links. If you buy through them, we may earn a commission at no extra cost to you. Learn more.
Quick Answer
How do you clean a hummingbird feeder?
- Take it apart completely, every time. Ports, collars, gaskets and the base, not just the bottle.
- Hot water and a brush is the baseline. Audubon suggests mopping up spills with a sponge and hot water at least once a week.
- A dilute white vinegar soak loosens residue and discourages mold in the parts a brush cannot reach. Rinse thoroughly afterward.
- How often: Audubon says change the filler twice per week in warm weather, and Cornell Lab’s Project FeederWatch describes hummingbird feeders as needing attention every couple of days.
Bottom line: full disassembly, hot water, a vinegar soak when it needs it, and a feeder that makes all of that quick.
How Often the Sources Say to Do It
Two published positions, and they line up. Audubon’s guidance on hummingbird feeders is to change the filler twice per week in warm weather and to mop up spills with a sponge and hot water at least once a week. Cornell Lab’s Project FeederWatch describes hummingbird feeders as needing attention every couple of days, or ideally with each refill.
Treat those as a floor. Heat accelerates everything, so a feeder in an afternoon sun trap needs more attention than the same feeder in shade, and anything cloudy, filmy or specked gets emptied immediately regardless of the schedule.
Take It Apart, All the Way
Most of the growth is not in the reservoir where you can see it. It is in the collar threads, under the gasket, inside the port tubes and in the crease where the base meets the bottle. A feeder rinsed while assembled looks clean and is not, which is how a bottle that gets rinsed weekly still develops black specks.
So the first step is always full disassembly. Bottle off the base, base into its parts, gasket out, perch off if it detaches. Lay everything on a towel so nothing small disappears down the drain, and reassemble only once every piece is dry.

The Brushes That Actually Reach
A dish brush does the reservoir and nothing else. What you need is a set: a long bottle brush for the body, a narrow brush for the neck, and a thin port brush or pipe cleaner for the feeding tubes and the tiny channels behind them. Those small brushes are the difference between clean and apparently clean.
Hot Water First, Then Vinegar If Needed
For a feeder on a normal schedule, hot water and the brushes are enough. Nectar residue is sugar, it dissolves, and the reason people reach for something stronger is usually that the feeder went too long rather than that hot water is inadequate.
When there is a film you can feel, or a smell, a soak in a dilute white vinegar solution loosens what the brush cannot reach. Let the parts sit in it while you do something else, brush again, then rinse very thoroughly under running water so nothing sharp tasting is left behind for the birds.
Why Not Dish Soap
Audubon’s answer on hummingbird feeders is to avoid it, because dish soaps can leave a residue in the feeder. Hummingbirds are sensitive to off tastes and a soapy feeder gets abandoned. Hot water and vinegar do the job without leaving anything behind that a rinse might miss.
Black Mold and When to Stop Scrubbing
Black specks in the neck or dark growth in the port tubes mean the feeder went too long between changes, and the fix is a full disassembly, a vinegar soak long enough to soften the growth, and thorough brushing of every channel before it goes back into service.
There is a point past that where a feeder is not worth saving. Crazed and scratched plastic holds growth in the scratches, perished gaskets leak and cannot be scrubbed properly, and any part that has gone soft or cloudy will not come clean. Our piece on black mold in a hummingbird feeder covers the judgment call.
The Cleaning Schedule by Weather
The frequency column reflects what Audubon and Cornell Lab’s Project FeederWatch publish about changing nectar and cleaning hummingbird feeders; the remaining columns are practical routine rather than a source claim.
| Conditions | What the sources advise | What to do at refill | Act immediately if |
|---|---|---|---|
| Hot summer weeks | Audubon: change the filler twice per week | Empty, brush, rinse, refill small | Nectar looks at all cloudy |
| Mild spring and fall | Project FeederWatch: every couple of days | Empty and rinse hot | Ports feel sticky or filmy |
| Cool weather | Still change on a schedule, not on looks | Rinse and inspect the ports | Black specks appear anywhere |
| Any weather, weekly | Audubon: mop spills with a sponge and hot water | Full disassembly and brush set | There is any smell at all |
Hardware Decides Whether You Keep It Up
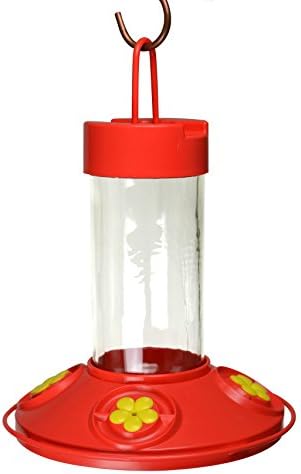
The feeder you clean twice a week is the feeder that comes apart in two pieces and goes back together without a fight. A saucer feeder is essentially a lid and a dish, both of which reach a brush easily, which is why it gets recommended to anyone who has fallen behind on cleaning before.
Bottle feeders hold more and look better, and they cost you time at every change because of the collar, the gasket and the neck. If that trade has already made you skip changes, our easy to clean feeder guide and saucer feeder guide are the right places to look.
Dishwashers, Glass and Plastic
Some feeders are labeled dishwasher safe for the top rack and some are not, and the label is worth respecting because heat warps thin plastic and perishes gaskets. Glass reservoirs handle heat better and scratch less, which matters over years, while plastic is lighter and does not shatter. The full comparison is in our hummingbird feeder guide.
Small Habits That Cut the Work
Fill less. A reservoir that holds a week of nectar for two birds guarantees that most of it will be poured away, and pouring away nectar is what makes people stretch the schedule. Match the fill to what actually gets drunk in two or three days.
Keep a second base or a spare feeder so one can be drying while the other is out. And wipe the outside at every refill, which Audubon recommends anyway and which also removes the sticky residue that draws ants and bees, as our guide to keeping ants off the feeder explains.
Frequently Asked Questions
How often should I clean a hummingbird feeder? Audubon advises changing the filler twice per week in warm weather and mopping up spills with a sponge and hot water at least once a week. Cornell Lab’s Project FeederWatch describes hummingbird feeders as needing attention every couple of days.
Can I clean a hummingbird feeder with vinegar? Yes. A dilute white vinegar soak loosens residue and helps with the growth a brush cannot reach, and it rinses away cleanly. Rinse thoroughly under running water before you refill.
Should I use dish soap? Audubon advises against it on hummingbird feeders, because dish soaps can leave a residue behind. Hot water with a brush set is the baseline, with vinegar as the step up when there is a film or a smell.
Do I need to take the feeder apart every time? Yes. The ports, collar threads and gasket seat hold far more residue than the reservoir does, and a feeder rinsed while assembled can look clean while growth continues in the parts you never see.
Can hummingbird feeders go in the dishwasher? Only if the product says so, and usually only on the top rack. Dishwasher heat warps thin plastic and hardens gaskets, so check the listing rather than assuming.
When should I just replace the feeder? When the plastic is crazed or scratched enough to hold growth, when a gasket has perished and leaks, or when black growth in the port channels will not come out after a proper soak and brushing. At that point cleaning is no longer the answer.
The Bottom Line
Full disassembly every time, hot water and a proper brush set as the baseline, a dilute white vinegar soak when there is film or growth, and a very thorough rinse. Follow the frequency Audubon and Cornell Lab’s Project FeederWatch publish rather than waiting for the nectar to look wrong, fill smaller amounts so less gets poured away, and buy a feeder that makes the job quick because that is what determines whether it actually happens. Read next: the easy to clean feeder guide, our nectar recipe with sources, and the saucer feeder guide.